Saturday, 17 November 2012

Simple Bacon ,Pesto Pasta


There comes a time in the week when you just dont have a clue what to make or maybe its the end of the month and the cash flow is low and you need to do a budget meal.But budget doesnt need to mean bake beans on toast for dinner or boring food.

This is a quick meal,hardly any prep needed and you can have a great meal on the table in 20-30 min .

Give this simple pasta dish a go this week.

Ingredients:

1 pack Linguine pasta
4-6 tbs Basil Pesto (this depends on your taste)
1 minced garlic clove (optional , the pesto will have garlic in it already but i love garlic so can niver get enough )
4 tbs Fat Free Greek Yogurt (optional to , i dont always add this , usually just when i want a creamy version with out all the calories)
Salt
Olive oil
3-4 Table Spoons freshly grated Parmesan cheese(try to get fresh and not the pre grated nasty shop stuff)
6 Rashes of bacon


Method:

1. Get your pasta in a big pot of boiling water and add about a teaspoon of salt to the water. Follow the package instructions on the time.
2. While your pasta is boiling you can now get on with frying the bacon , i do this in a non stick pan.
3. Once your done with the bacon lay it on some kitchen paper to drain excess oil from the bacon.
4.Grate the parmesan and set aside.
5.Cut your bacon into strips or small blocks.
6.Your pasta should be ready now , drain the pasta ,rinse pasta in a strainer. Put the patsa now back into the same pot and return it to the stive on a very love settling , like a 1 or 2.
7. Add about 1 tsp of olive oil to the pasta to prevent the pasta sticking together. Add to this the pesto,garlic(optional),Greek Yogurt(optional) and the grated Parmesan.
8. Using a pasta spoon list up the pasta and mix through .
9.Serve this with some of the bacon on top and if you like some more Parmesan cheese.


I hope you enjoy this as much as we do . You can also serve it with some crispy garlic bread. I know all this garlic is for sure not going to make you popular , but garlic is very good for you to ;)

XOXO


Sunday, 11 November 2012

Carrot Cake ....


If I have to think back to when i first tasted Carrot Cake it takes me back to my younger days ,wow saying it like that makes me sound old lol . I remember when i was little this was one of my moms treats she would love to have when we went out for tea or lunch .

I had a look around for a recipe that i could relate to and i found this one from the one and only Paula Deen.http://www.foodnetwork.com/recipes/paula-deen/grandma-hiers-carrot-cake-recipe/index.html The recipe is for a cake but i used it as Cup Cakes . It worked well i think . I do see she has a recipe for just cup cakes that is basically the same recipe but with a bit more flour.

Well this worked for me but ill post both and you can decide with one you prefer.

Ingredients:

2 Cups all-purpose flour
2 Cups sugar
2 teaspoons baking soda
2 teaspoons ground cinnamon
1 teaspoon salt
4 eggs
1 1/2 cups vegetable oil
3 cups grated carrots
1  cup chopped pecans, optional(i would say if you unsure try it you will not regret it)

Method:

1.Preheat oven to 350 degrees F. Grease and flour 3 (9-inch) round pans; Line bottom of the pans with parchment paper. OR if you using this for Cup Cakes you can place large Cup Cake paper cups in your cup cake pans.(i got about 20-24 cup cakes out of this mixture)

2.In a large bowl sift together flour, sugar, baking soda, cinnamon, and salt.

3. In a smaller bowl or jug beat the eggs and vegetable oil.

4.Add the wet ingredients into the dry . Using a hand mixer, blend until combined.

5. Add carrots and pecans-if you have decided to use them.-I must admit when i was mixing this all up it didnt look very uhm "pretty". BUT the end result was really yumie!

6. Pour into pans. Bake for approximately 40 minutes. Remove from oven and cool for 5 minutes. Remove from pans, place on waxed paper and allow to cool completely before frosting. OR if your are using this mixture for Cup Cakes scoop mixture into cup cake cups about 1/2 -3/4 full. Bake them for 25-30. I would suggest to check them after 20 min.


                                                            OR

Now as promised here is the Recipe Paula Deen uses for the Cup Cakes , as i mentioned befor either one works for me.http://www.foodnetwork.com/recipes/paula-deen/corries-carrot-cupcakes-recipe/index.html

Ingredients:

3 Cups all purpose flour
3 Cups granulated sugar
1 tablespoon baking Soda
2 teaspoons ground cinnamon
1 teaspoon salt
1 1/2 cups vegatable oil
4 eggs
1 tablespoon vanilla extract
1 1/2 cups, 3 (4-ounce jars) baby food carrots (this sounds odd i know but it does add moisture but if your not too keen on the idea or you have carrots already bought then use 2 Cups grated carrots)
1 cups chopped pecans
1 1/2 cups sweetened shredded coconut
 
Method :
 
1.Preheat the oven to 350 degrees F. Line 18 cups of 2 regular muffin pams with paper cupcake liners.

2.Sift the flour, sugar, baking soda, cinnamon, and salt into a large bowl. In a separate bowl, whisk together the oil, eggs, vanilla and carrot puree(if your using grated carrots then wisk u te wet ingredients add that to the flour mixture and add the grated carrots with the coconut). Stir the wet ingredients into the dry ingredients. Fold in the pecans and coconut.

3.Fill the prepared cups halfway. Bake until golden and a tester inserted in the middle of a cupcake comes out clean, about 30 minutes. Let stand for 5 minutes before popping the cupcakes out of the trays to cool completely on wire racks.


Now for the best part , the cream cheese frosting. Please dont make the mistake to be too eager and try frost your cake or cup cakes while they still warm . They must be completely cool. Otherwise your frosting will melt and slide off.

Cream Cheese Vanilla Frosting

Ingredients:

2 teaspoons vanilla extract (yes the real stuff not the essence)
1 package of philadelphia plain cream cheese (I used a 300g package but you can also use 1 package of the Simonsberg plain cream cheese it is 230g but you will just use less icing sugar)
750g icing sugar (sifted if there is lumps )
100g unsalted margarine or butter (if using margarine it can not be the spreadable type )

Method:

1.Firstly your butter or margarine needs to not be straight out the fridge . If im making this frosting i take the butter out about 4 hours befor i need to use it.
2. Using a electric wisk (of you dont have this you can by all means do it old school way and use a wooden spoon and beat this by hand) beat the butter untill all soft.
3. Now add the cream cheese and combien it with the butter.
4. Slowly start adding the Icing sugar bit by bit beating in between .
5.When the mixture becomes firm and it is a "pipe-able concistency or spreadable"
6.Add the vanilla and mix well.
TASTE!!!! if you find its too sweet then you can add more cream cheese but remember the mixture will soften a little then to .

You are now ready to frost your Cake or Cup Cakes . Its up to you how you want to do that . For the cake i would ice the two layers together and then the top . Maybe sprinkle some shredded coconut on top or some chopped pecan nuts. I woulded frost the sides , you dont want to go over kill on the frosting , you want the right balance .
As for the cup cakes , play around a bit with different type of pipping nozzels and get different looks to those cup cakes, you can even just use spatula and smooth the icing on . What ever you decide to do remember just have fun while doing it . Baking is FUN!


As for storing them , if its cold by you and your going to be eating them the next day or two i wouldnt put them in the fridge but put them in a closed container. If its really hot you will want to put them in the fridge and take it out about 30min befor serving .
They freeze well also , yes some people may think im nuts but i have been freezinf cup cakes for a long time and they are great even after they have been frozen. If you have made too many cup cakes or too much cake , freeze them in a sealed container and when you want to have a treat take them out about a hour -two hours before the time left at room temperature.

Happy baking all.

Wednesday, 7 November 2012

Chocolate Fondant


I think many people hesitant to make this dessert cause they think its too hard etc, but this is fool proof and you will wow your guests or family with this one. Give it a go!

I cant take all the credit for this recipe how ever , its a big thank you to Eric Lanlards awesome recipe that is fool proof.


Ingredients:

  • 125 g  Unsalted butter, plus extra for greasing
  • 1 tbsp cocoa powder, plus extra for dusting
  • 125 g  Dark chocolate, broken into pieces
  • 60 g Caster sugar
  • 3 Small eggs
  • 3 Small egg yolks
  • 100 g  Plain flour, sifted
  •  
    Method:
     
    1. Preheat the oven to 200°C (fan 180°C)/400°F/gas mark 6. Thoroughly butter four ovenproof moulds  and dust lightly with the extra cocoa powder. Place these in the fridge while you get on with the rest.
    2. Melt the measured butter and the chocolate together in a bowl over a bain-marie, suitable saucepan with simmering water. The water must not touch the base of the bowl if it does it will burn the chocolate. once all is melted remove it from the heat and set aside.                                 
    3. In a large bowl, using an electric hand whisk, beat together the sugar, eggs and egg yolks until light,pale and it has doubled in volume.
    4. Pour the melted butter and chocolate over the egg mix and then fold in the sifted flour and measured cocoa using a metal spoon.
    5. Place the individual moulds on to a baking sheet. Pour the mixture into the prepared moulds, 3/4 way full and bake in the preheated oven for approximately 8-12 minutes. Depending how soft you like the middle.
    6. Loosen the edges with a knife and carefully turn out of the moulds on to the serving plates.( i never have to loosen mine they easily come out of the molds.)
    Now its your choice what you want to serve it with . I have served Iwith almond flavoured soft wipped cream, vanilla ice cream , berry sauce or even custard.
    Here are a few serving suggestions:

                                              Just simple and dusted with icing sugar .

     
    Kept in the oven proof dishes drizzeled with custard
     
     
    With a side of berries.


    Its best to serve this as soon as it comes out the oven , it is not the sort of dessert you can heat up the next day .

    Happy baking xoxo

    Sunday, 7 October 2012

    Breast Cancer Awareness month

    So what will you be doing this month ? At my day job we will be raisng funds at the end of the month for breast cancer awareness month . I am thinking of baking a little something to add to this event .... will you be baking ?

    Pumpkin Fritters - a little taste of home


    Mmmm just the mere thought of these make me hungry. Back home when there would be a buffet of cooked food you can expect these to make an appearance. I guess every family will have there own way of making these and what it comes down to in the end is that they are scrumptious. This recipe is very simple and easy to make. You can use butternut squash or pumpkin your choice, both taste good.

    Ingredients:

    2 Cups of pumpkin (make sure that this is drained of as much liquid as possible)
    3/4 + Cup of flour
    Pinch salt
    1tsp Cinnamon
    2 tsp Granulated sugar
    2 tsp baking powder
    2 eggs
    Oil for the pan
    Extra cinnamon and sugar mixed for serving.

    Method:

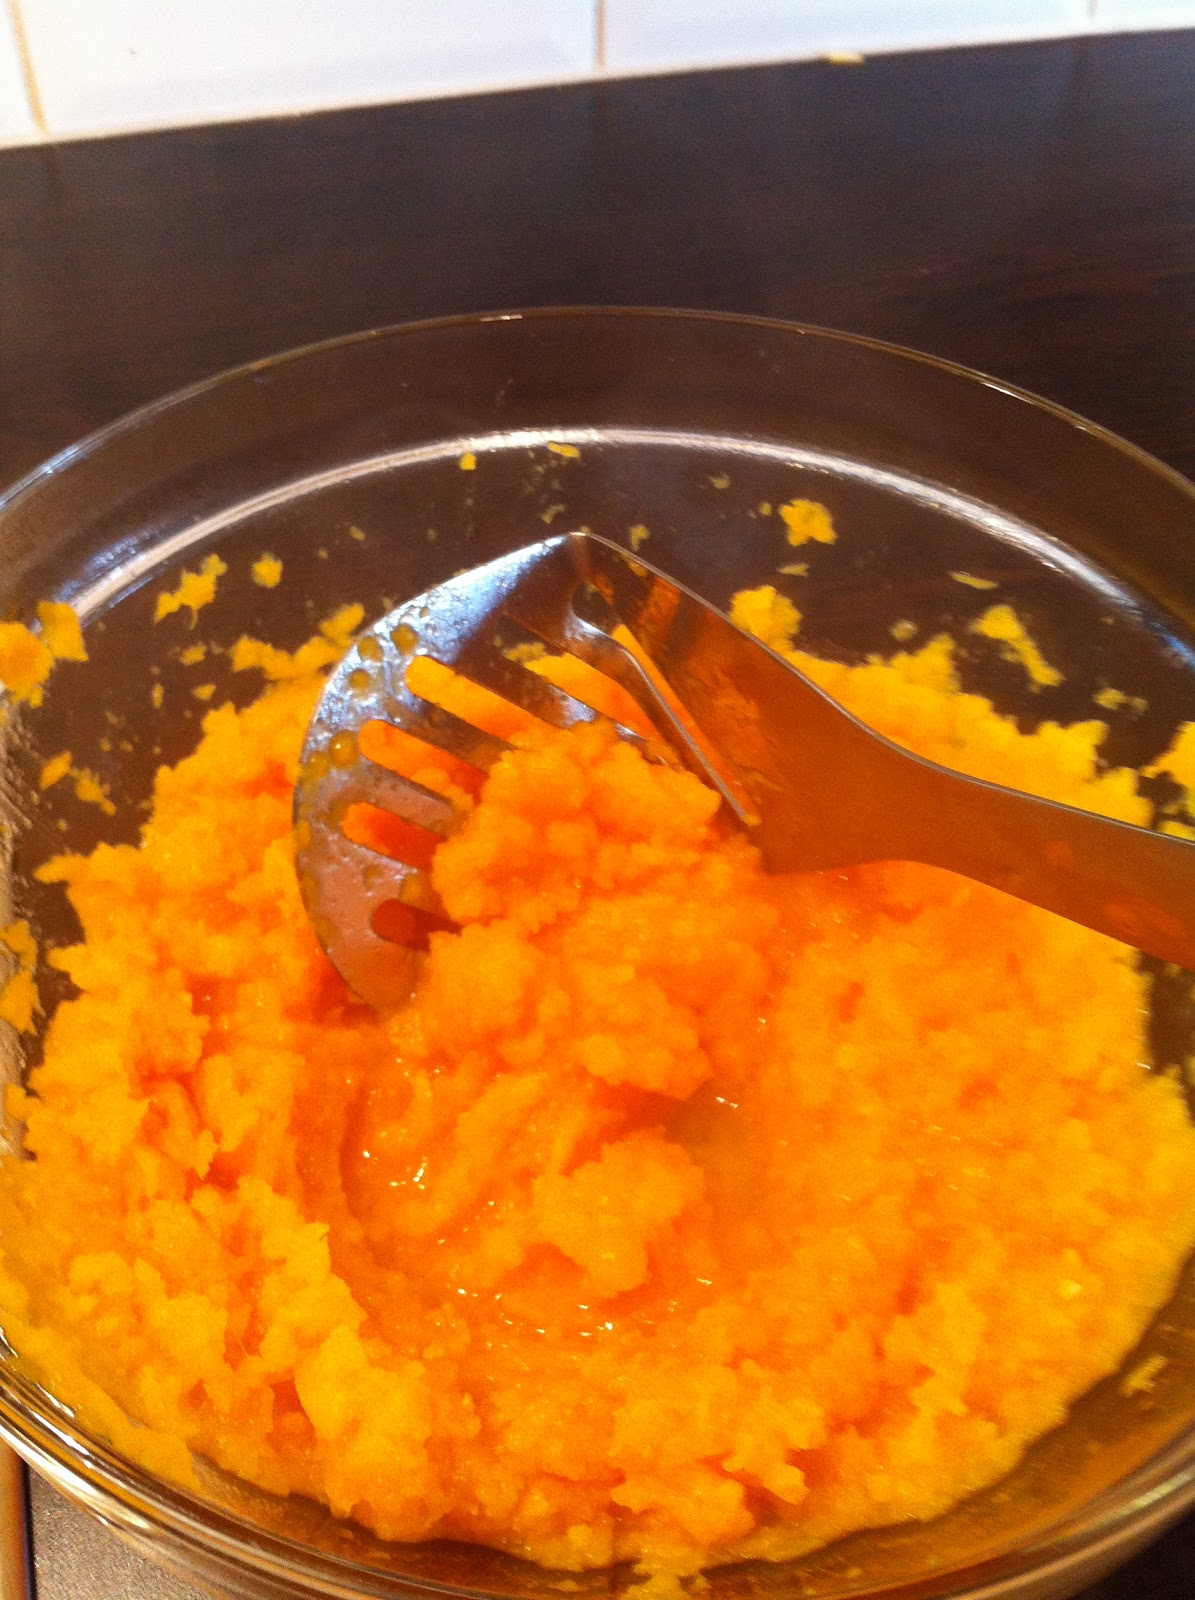
    1. Make sure that after you have cooked the pumpkin and mashed it up smooth, that you put it into a fine sif strainer and press down with the back of a spoon to press as much liquid out as possible.
    COOK IT..
    MASH IT....
    DRAIN IT....

    2. Combine all the dry ingredients in a bowl and mix well.

    3. Add the 2 eggs and the pumpkin and mix very well. The mixture should not be runny it should be like crumpet batter. If for some reason it’s too dry add a little bit of milk and if it’s too wet add more flour.

    4. Heat up a large frying pan with a little bit of oil and spoon in mixture .Keep pan on a medium heat. You will know it’s ready to turn because you will actually see that the sides are semi cooked, or you could just lift up and check, then flip over cook for a minute. Place on some kitchen paper and sprinkle with some cinnamon and sugar mixture.


    You can have this with a meal or as is. Its very filling, im still greedy when it comes to these so I load up my plate but I only manage to eat 4.

    All this talk of pumpkin and eating of it to is making me think ill need to make some pumpkin pie for Halloween...


    Enjoy xoxo


    Tuesday, 2 October 2012

    Red onion & Orange Roasted Chicken


    I need to admit that I have NEVER roasted a chicken, so I was pretty stressed about doing this for the first time. I searched around for a recipe that appealed to my taste buds. I came across this one on the Martha Stewart website. Not only is it simple but for a first timer like me that is just what I needed.

    I love the idea of caramelized red onion and orange so this defiantly appealed to me.

    So here is the recipe, hope you enjoy it and give it a try.

    Ingredients:
    2garlic clove, minced
    Coarse salt
    4 tablespoons unsalted butter, softened
    2 navel oranges (preferably organic), 1 zested, both cut into 2-inch wedges
    2 teaspoons finely chopped fresh thyme, plus a few sprigs
    1 whole chicken (4 to 4 1/2 pounds)
    2 red onions, peeled and cut into 1 1/2-inch wedges
     
    Ingredients:
    1.       Preheat oven to 240C. Mash garlic and 1 teaspoon salt into a paste.
    2.       Combine garlic paste, butter, zest, and chopped thyme. Gently separate skin from breast of chicken, and rub half of the butter mixture under the skin on each side. Season well with salt.
     
    3.       Fill cavity with 2 orange wedges, 1 onion wedge, and thyme sprigs. Place chicken, breast side up, on a rimmed baking sheet, and tuck wings under. Tie legs together with kitchen twine. Scatter remaining oranges and onions around chicken. Dot oranges and onions with 1 tablespoon butter mixture.
     
    4.       Roast for 30 minutes. Brush chicken with remaining butter mixture. Flip oranges and onions. Rotate sheet, and roast for 15 minutes more. Remove oranges and onions if caramelized. Roast chicken until juices run clear and an instant-read thermometer inserted into the thickest part of a thigh reaches 165 degrees, 10 to 15 minutes more. Let rest for 10 minutes before serving.
     
     
    While this beauty is roasting I pre boiled some potatoes just fro about 6min,chopped them into quaters and roasted then in the oven for 35min or untill cooked through and golden brown.
     
     
    And at last its all ready , I let the chicken rest for 10 min befor i carved it into portions.
     
     
    I served mine with some steamed mixed veg.


    I am very proud of this dish it was "delish"! So book mark this ;)
     
    happy cooking and baking xoxo

    Sunday, 30 September 2012

    South African pancakes


    Back home in South Africa you would find everyone eating pancakes when it was raining. I love pancakes so much it doesn't even have to be raining for me to whip up a batch.

    I am a pancake snob though, you either have the right recipe or you don’t. Back home when you went to church markets you would find these old ladies making these lovely pancakes. They were always the BEST, I was convinced that when you get old that you miraculously wake up one morning and instantly know the secret recipe..... lol well I believed that until now that is. I came across this recipe on http://recipes.sparkpeople.com/recipe-detail.asp?recipe=934533 and decided to give it a try. The recipe calls for vinegar but I substituted it for lemon juice.

    When I started mixing all the ingredients together I though this was bound to be a disaster, but I kept the faith and proceeded with following the recipe step by step. I was tempted to add more flour but decided that if this is the way its suppose to be I should at least try it.

    Success!!!! I found the recipe I have been looking for!! I made a few pancakes, sprinkled them with cinnamon and sugar and run to my husband in the other room, I think my face said it all I had this massive cheesy grin on my face, he tried it and was ecstatic. Not only have I found the recipe ive been searching for but I have a taste of home right here with me.

    So here we go enjoy:

    Ingredients:

    3 cups of all purpose flour
    3 eggs
    half a cup of oil (any oil should work)
    25mL vinegar (regular white vinegar or 35ml fresh squeezed lemon juice)
    3mL salt
    15mL Baking Powder
    4 cups of water

    Method:
    1.Grab a BIG mixing bowl and beat the eggs and water together until well blended,then add the oil,salt and vinegar/lemon and mix well.
    2.Sift in the flour, mix well. Make sure that you have a smooth lump free mixture.
    3.Now lastly add the baking powder,and stir that in.
    4.The consistency will be very runny so dont let that have you worried ,trust me on this and stick to the recipe.
    5.The mixture works best if you leave it to stand for a few hours (i leave mine to stand either over night or for 2hours+)
    6.Get out a round non stick frying pan,the non stick pans work best. You can add a little bit of oil to the pan if you like but i find its then too oily and cause the batter has oil in it there is no need for it in the pan as well.
    7.Heat up your pan on a meduim heat.Take 1 laddle full of batter to the pan. I lift and tilt the pan as i pour in the mixture ,this way spreading the mixture evenly .


    8.The pan cake will make bubbles like you see here above. when the sides start lifting a bit then you know it should be ready to flip. Loosen the sides a little with a flexable spatula. The move the pan back and forth (the pancake should be loose and easly moving around the pan now), then lift the pan push forward ,up and pull back catching your pancake............okay okay you dont have to do this, but give it a try its fun. You can also use a big spatula or two to flip the pan cake over quickly.
    It will look like this:
    9.Now cook it on this side for about a minute (depending on the heat of your pan). Flip the pan cake over again to check, it should look like this below:

    10. Slid it off the pan onto a plate. It is now ready to be filled with what every you like. I like mine the traditional way with cinnamon ,sugar and a squeez of lemon juice over it.

    Just mix some white sugar and cinnamon together to your taste,sprinkle on the pan cake ,squeez some lemon juice and roll up the pan cake. Now for the best part "tuck in" and enjoy :)


    YUMMY!!!!!!